
In order for reports in Dentrix to be accurate, it’s critical to enter new doctors and hygienists properly.
When it comes time to add a new doctor or hygienist to your practice, it’s critical that they are entered into Dentrix properly from the very beginning in order for reports to be accurate.
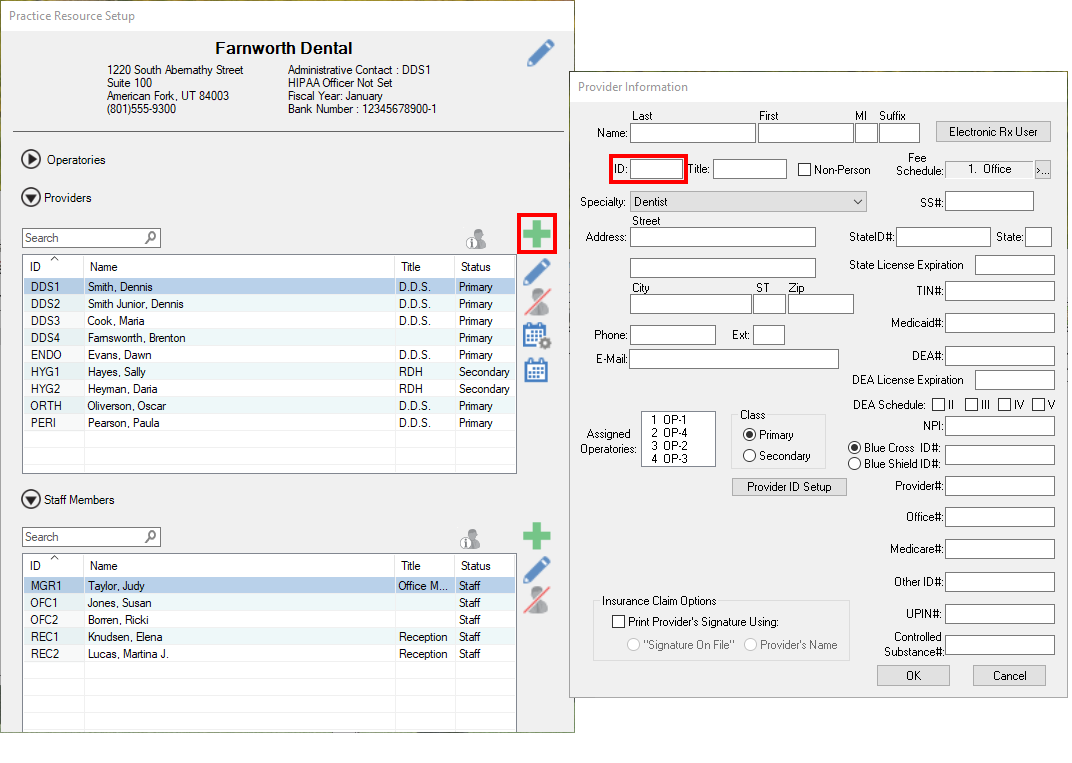
First, you’ll need to assign the provider a four-digit provider ID. It’s important to consider how you want to use provider IDs in your office because once assigned, they can’t be changed. Some offices use DDS1, DDS2, HYG1, HYG2, and so forth. Other offices use provider initials. I would recommend that whichever system you choose, keep it consistent throughout the office.
Set up the new provider in the Practice Resource Setup in the Dentrix Office Manager. Click the green plus sign to add a new provider. Then enter the provider ID you’ve decided on and the rest of the provider’s pertinent information, including license information. Doctors should always be assigned as primary providers in Dentrix, while hygienists should be assigned as secondary providers.
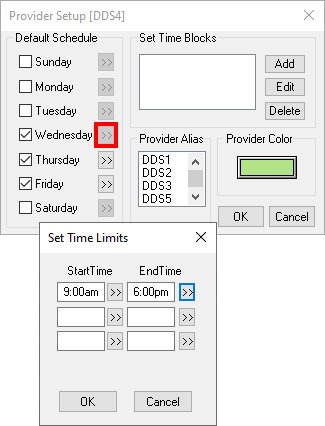
Once you have entered the provider’s information and clicked OK, you can set up their scheduled workdays and hours.
Select the provider in the list, and then click the Setup Selected Provider button.
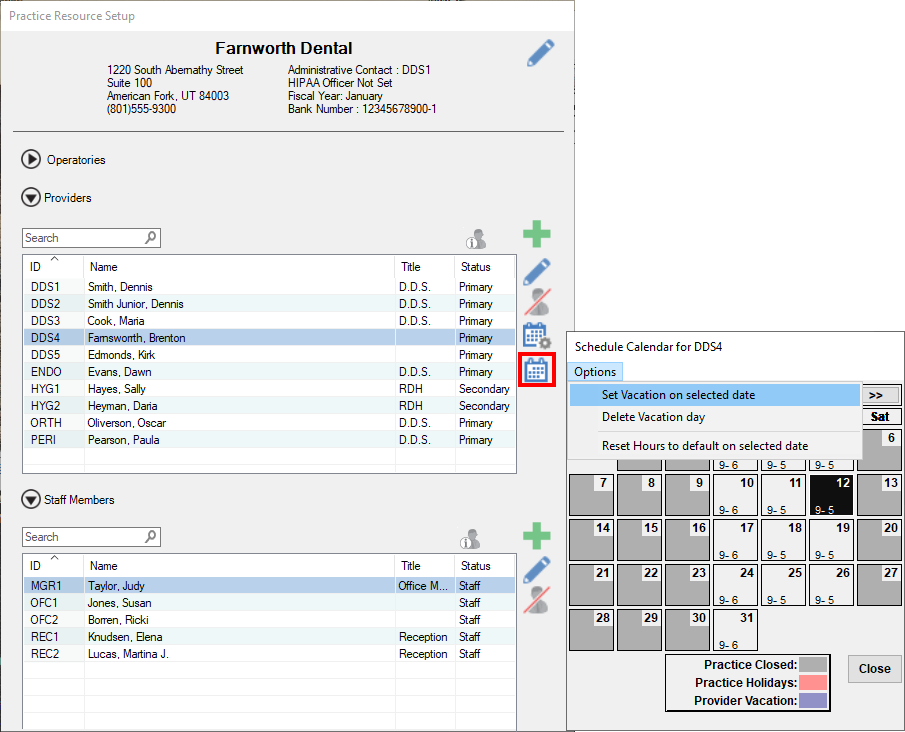
You can also schedule vacation days for the provider by clicking the Schedule Selected Provider button, to ensure accurate reporting.
Now that you’ve set up your new provider properly, what should you do with a provider they are replacing, such as if HYG2 is new to your practice and is replacing HYG1?
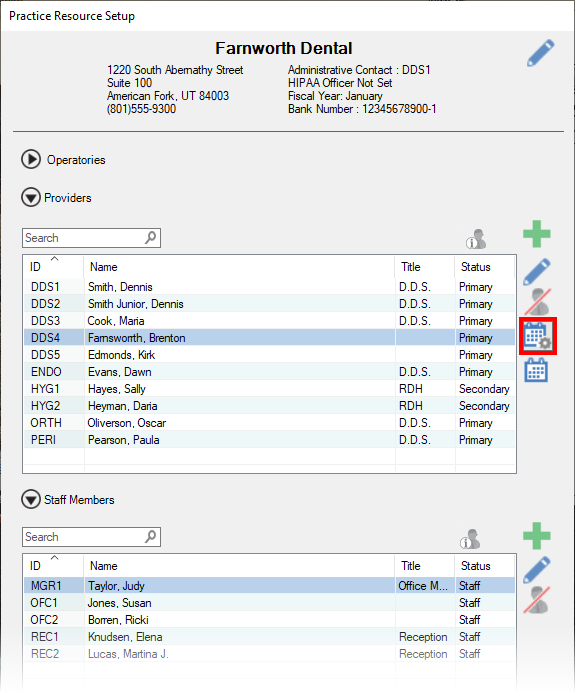
It’s best to inactivate providers that no longer work in your practice. The benefit of inactivating them is that they won’t continue to show up on reports, and they won’t continue to appear in the list of providers to choose from when scheduling appointments or setting procedures complete. That way appointments and procedures won’t be assigned to them accidentally.
If you’re using Dentrix G7.4 or later versions, you can use the Inactivate Provider feature to streamline the process of inactivating a provider. First you must select a replacement provider for the provider you are inactivating. It’s important to replace a doctor with another doctor and a hygienist with another hygienist because any treatment-planned procedures and upcoming appointments assigned to the provider you are inactivating will be replaced with the replacement provider. Procedures and clinical notes that are history for the provider you are inactivating won’t be changed; this change would only affect treatment planned procedures and upcoming appointments.
Once you have selected a replacement provider, you will have the option to transfer any outstanding patient balances owed to the provider you are inactivating to the replacement. In the example I gave earlier of HYG2 replacing HYG1, it would be a good idea to transfer patient balances, providing that HYG1 was an employee paid based on an hourly rate and not on collections. If you are inactivating a doctor who was paid based on collections, have a discussion with your practice owner before transferring any patient balances because that doctor may still have outstanding collections owed to him or her.
If you do choose to transfer balances, Dentrix will then give you an option to select an adjustment type to use to transfer these balances. I recommend you use a unique adjustment type for this type of internal balance allocations instead of something generic. For example, use something like Provider Adjustment Credit, and not Misc. Credit. That way you can easily track these internal offsetting adjustments.
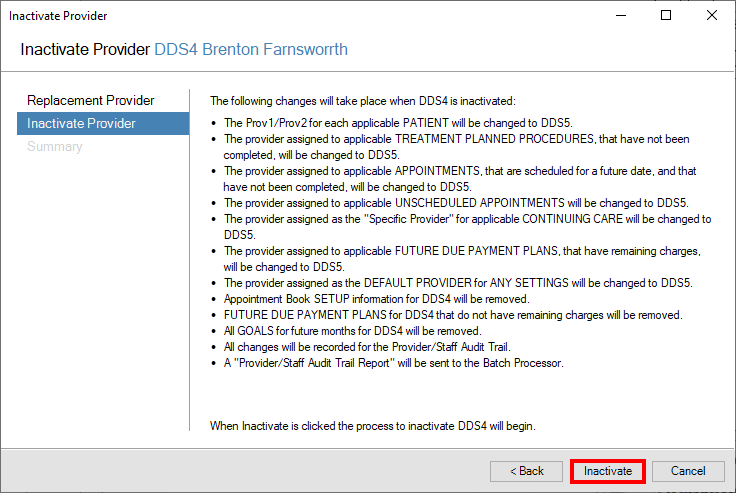
Next, Dentrix will provide you with a list of changes that will happen once the provider is inactivated. Be sure to review this list carefully so you are aware of all the changes that will be made. The final step is to click the Inactivate button.
The process of entering new providers properly into Dentrix is critical so that reports calculate data accurately. It’s also important to inactivate providers that no longer work in your practice. That way they won’t appear on and skew reports. They also won’t appear on the list of providers to select from when scheduling appointments or setting procedures complete. The inactivate provider feature in Dentrix G7.4 can help you to streamline the process of inactivating providers.
Learn More
For additional information, see the following :
- The Importance of Inactivating Providers in Dentrix
- September 2020 Dentrix Release – Inactivate Provider

By Charlotte Skaggs
Certified Dentrix Trainer and The Dentrix Office Manager columnist
Charlotte Skaggs is the founder of Vector Dental Consulting LLC, a practice management firm focused on taking offices to the next level. Charlotte co-owned and managed a successful dental practice with her husband for 17 years. She has a unique approach to consulting based on the perspective of a practice owner. Charlotte has been using Dentrix for over 20 years and is a certified Dentrix trainer. Contact Charlotte at [email protected].


