
With Patient Engage, you can maintain control of your schedule by creating multiple booking reasons at once while giving your patients the flexibility they need to schedule their own appointments.
Updated 2/27/2023
94% of patients favor online booking over traditional methods, so much so that they say that they are more likely to choose a new provider that offers online booking options.
If you think about it, it makes perfect sense that patients prefer online! They’re already multitasking in so many areas of their busy lives. They don’t want to play phone tag while trying to see what works with their family’s schedule, and they don’t have time to think about scheduling an appointment during normal business hours. Online booking opens things up so that patients can schedule when it’s most convenient for them.
With online booking in Patient Engage, you can maintain control of your schedule while giving your patients the flexibility they need.
Is this your first time hearing about online booking in Patient Engage? Then check out the Online Booking Overview Video to see how online booking can work for you!
Getting Started
If you are ready to jump into Online Booking, there is an easy way to do that. You can create multiple booking reasons at once, and the best part is that it is fully customizable, so you don’t have to worry about losing control of your schedule.
The “Setting up Multiple Bookings” feature is configured to walk you through the process step-by-step. If you need to go back and change information, you can do so at any time without losing the progress that you’ve made.
Note: Make sure that you’re using the latest version of your Dentrix practice management system. For Online Booking to work correctly, you’ll want to be on Dentrix version 6.6 or higher.
How to Create Add Multiple Booking Reasons
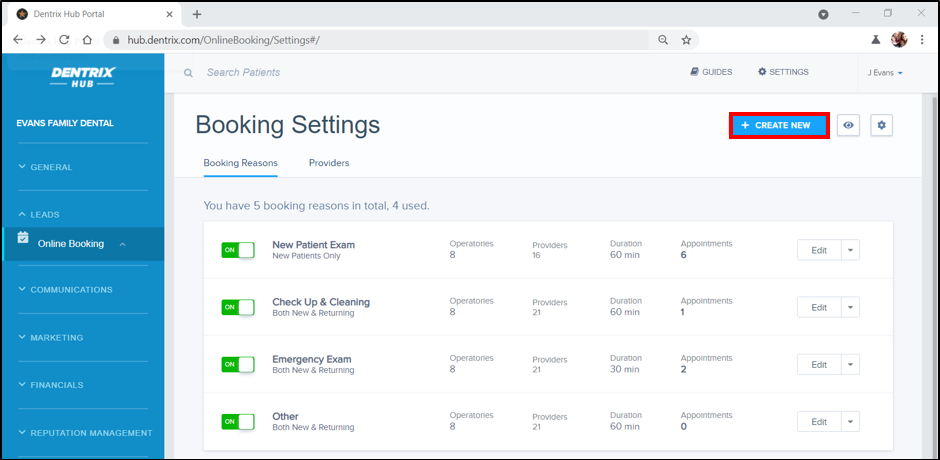
Step 1: Create a new setting.
From the Dentrix Hub, click Leads > Online Booking > Booking Settings to open the Booking Settings, and then click + CREATE NEW.
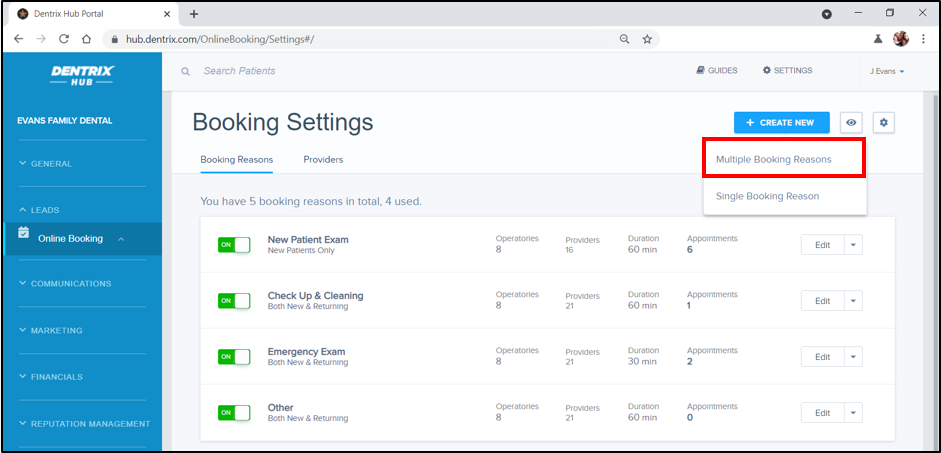
Step 2: Select the option for multiple booking reasons.
Select Multiple Booking Reasons. Creating multiple booking reasons takes you through the steps to set up all the appointment types that your patients can choose. This is different from selecting Single Booking Reason which only allows you to set up one booking reason at a time.
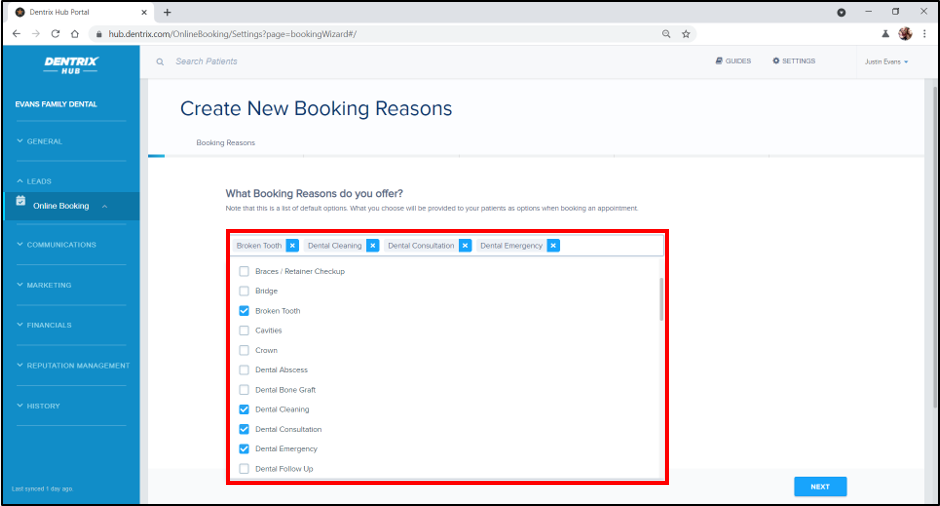
Step 3: Select the booking reasons.
The booking reasons are the types of appointments that your patient can choose from when they schedule an appointment through online booking. Select the reasons you want to be available for online booking.
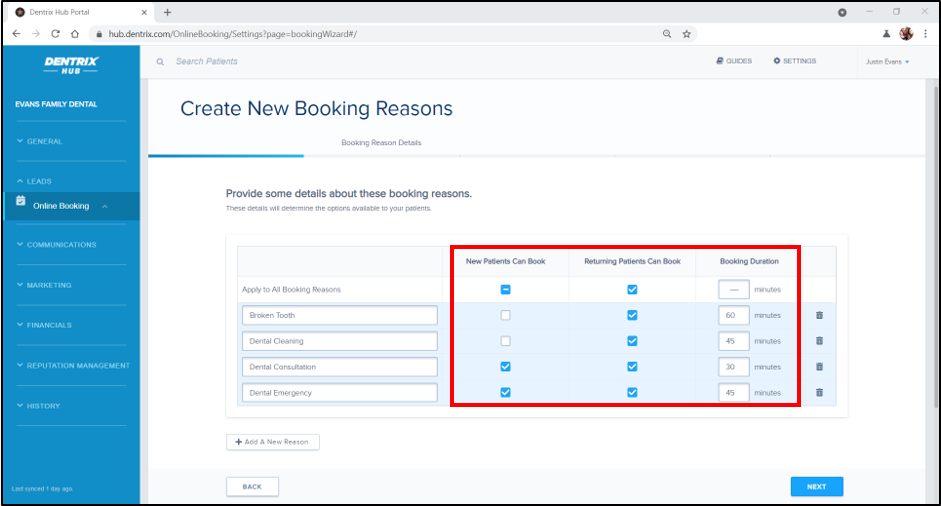
Step 4: Provide details about booking reasons.
For each booking reason, add details like name, duration, and which type(s) of patients can book this type of appointment. It’s important to edit the reason names because you want the terms on the booking reasons to match the wording that is familiar to your patients.
The booking duration refers to the time blocked off in your schedule for each booking reason. You can customize this for the entire practice or specific providers. If you’re going to change the booking duration for a provider, you can go back and edit that manually in Patient Engage after completing the Multiple Booking Reasons setup. The other providers in your office will be assigned the default duration that you specify here.
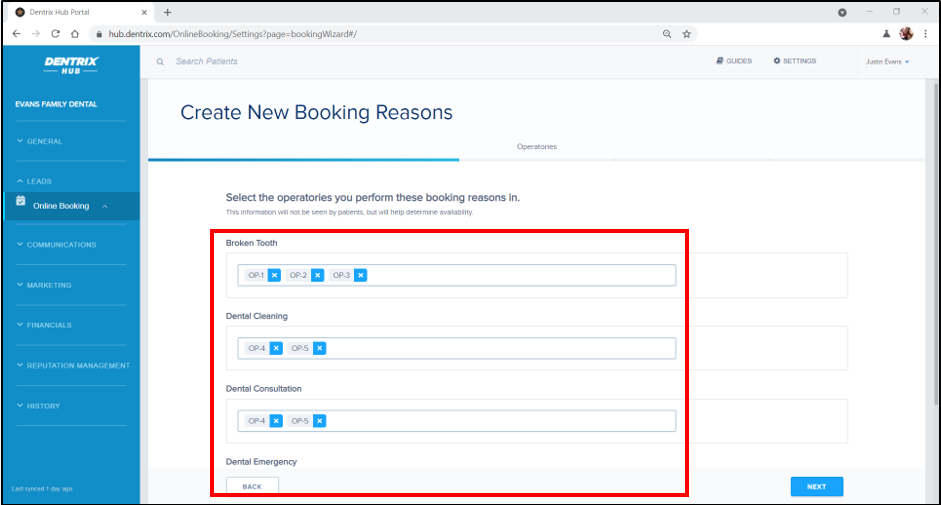
Step 5: Select the operatories that are available for the bookings.
Assign an operatory or operatories that you want available for each booking reason. You may only offer certain treatments in specific operatories, so this is an important distinction.
Note: You can select multiple operatories for each booking reason.
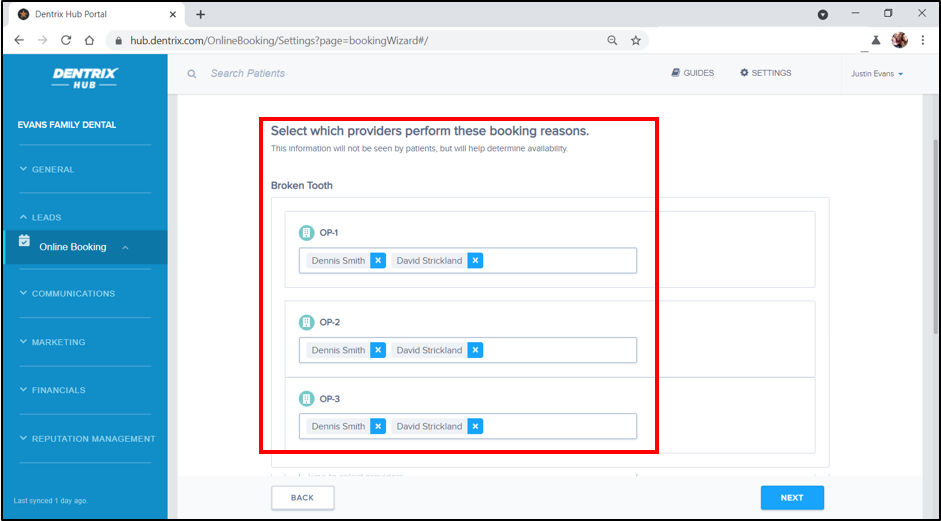
Step 6: Select the providers for these booking reasons.
Select the providers that will perform each type of treatment and assign them an operatory.
Note: You can select multiple providers in each category.
Step 7: Click to preview what your patients will see.
You need to know how this will look for your patients so you can answer any questions that may arise. Click the Preview button to double-check that everything looks exactly how you want it in your system.
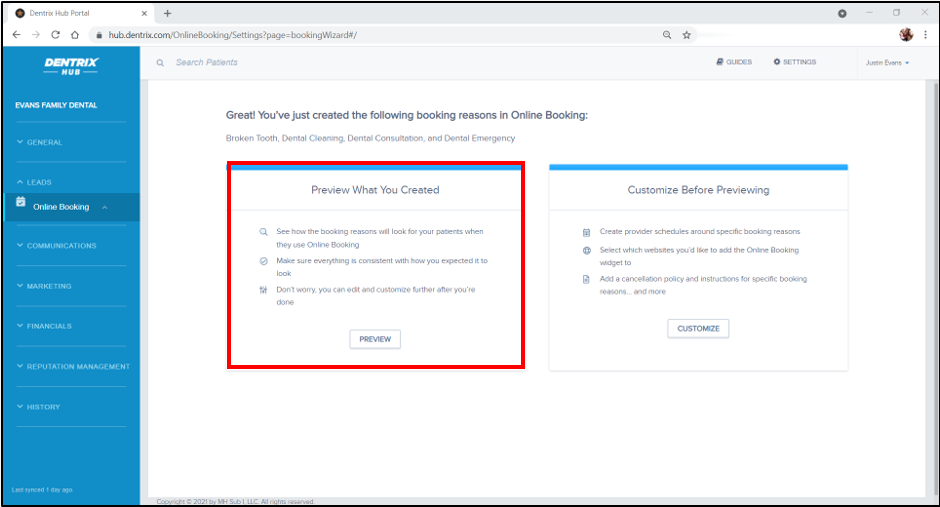
Step 8: Customize additional booking settings.
If you click the Customize button, it will take you to your booking settings. Here, you have options to be even more procedure and provider specific.
You can be as specific as your practice needs, giving you the same control over the appointments you would have had if you talked to the patient in person.

Let Them Book It!
Ready to offer a streamlined, efficient way for your patients to book appointments? Visit us here or call your Account Executive at 888.313.1332.
Ready to Learn More?
Check out our in-app tour. In the Dentrix Hub, click Guides at the top right corner of your screen. Then click Online Booking.
View the on-demand webinar titled, How to Get Started With Patient Engage Online Booking.
Click here for more content to help you get started with online booking.


