
Keep track of provider and staff hours using Dentrix tools.
I hope I’m not telling my age when I say that I remember using an actual punch-style timeclock to punch in and out on a time card each day. As the office manager, I would have to manually add up each employee’s hours for each pay period. It was always a time-consuming process. Then we started using the Time Clock feature in Dentrix. It made the process so much easier. Dentrix would do the work of calculating each employee’s hours based on a selected date range.
In order to use the Dentrix Time Clock, each staff member will need to have a unique user ID. You can set up each employee with a user ID in the Dentrix Office Manager. Select Maintenance > Practice Setup > Practice Resource Setup.
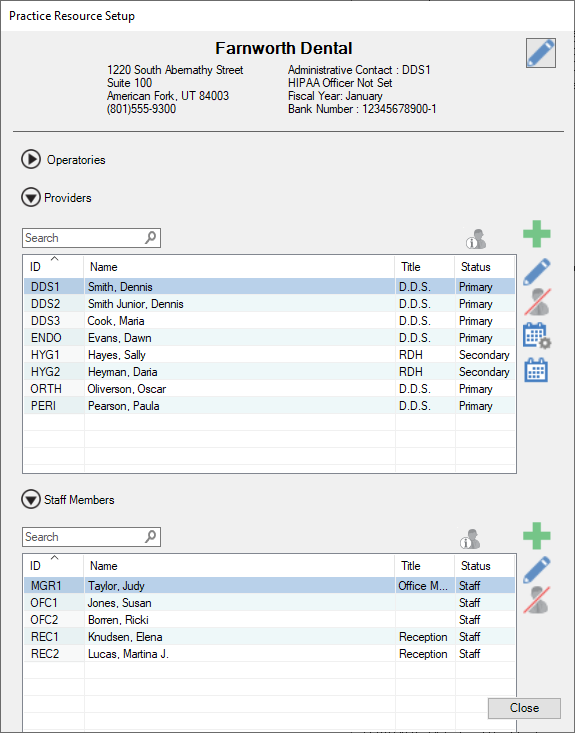
Use the plus (+) icon to add a new provider or staff member, or select a name on the list and click the Edit (pencil) icon to make changes.
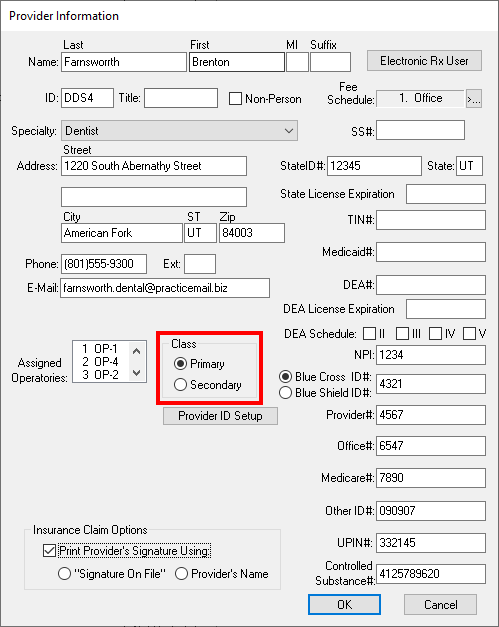
Remember when setting up employees in the Practice Resource Setup that dentists and hygienists should be entered under Providers, with dentists being primary providers and hygienists being secondary providers. Assistants and administrative staff should be entered under Staff.
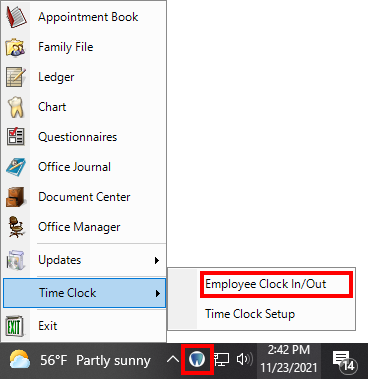
Once set up in Dentrix, staff can use the Time Clock to clock in when they arrive the morning, in and out for lunch, and clock out at the end of each day. To access the Time Clock, right-click the Dentrix Quick Launch icon in the notification area of the Windows taskbar, then select Time Clock > Employee Clock In/Out.
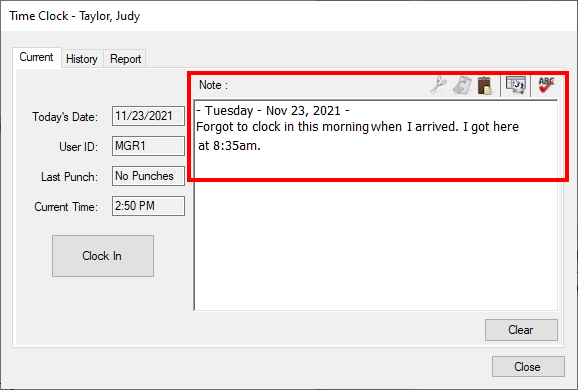
If an employee forgets to clock in or out, they can add a note to on their time card to communicate to the office manager they made an error.
At the end of each pay period, I recommend the office manager print the Time Clock report. Open the Time Clock Module and select Report. On the report, Dentrix calculates each employee’s hours and gives you a total number of hours for a specific date range. The report displays a list of employees and their hours.
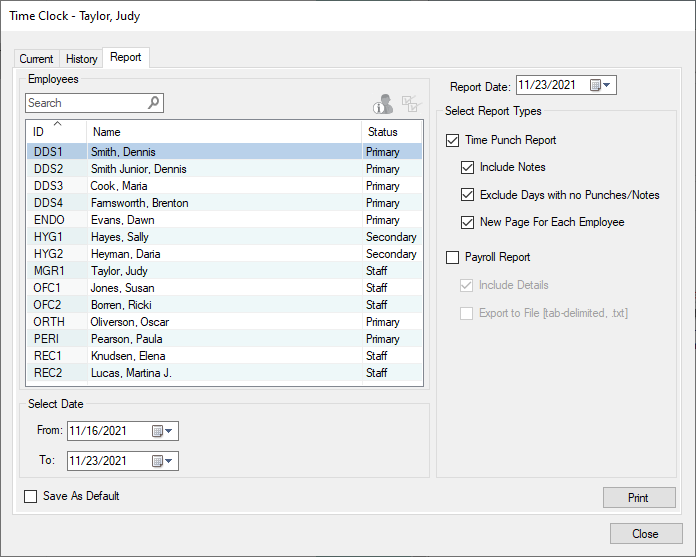
Select the employees you want to include on the report, then select the date range for the pay period. Under the Select Report Types options, check the box to include notes. These would be notes that an employee wrote on their time card, for example, “I arrived at 9:00am, but forgot to clock in”.
Check to Exclude Days with no Punches/Notes so Dentrix doesn’t print days without punches like weekends. I recommend checking the New Page for Each Employee option and giving it to the employee to review. They can sign the time card to verify they have reviewed it.
I have found that allowing employees to verify their time card can eliminate future discrepancies regarding hours. You can keep the signed time card with the employee’s check stub, or you can scan it into the employee’s Dentrix Document Center.
Learn More
For additional information, read the following :
- Tick-Tock, Set Up Your Time Clock
- Punching the Clock: Start Getting Paid in 4 Easy Steps
- What To Do When You Hear, “Oops! I Forgot to Clock In!”

By Charlotte Skaggs
Certified Dentrix Trainer and The Dentrix Office Manager columnist
Charlotte Skaggs is the founder of Vector Dental Consulting LLC, a practice management firm focused on taking offices to the next level. Charlotte co-owned and managed a successful dental practice with her husband for 17 years. She has a unique approach to consulting based on the perspective of a practice owner. Charlotte has been using Dentrix for over 20 years and is a certified Dentrix trainer. Contact Charlotte at [email protected].


