Eliminate the manual process each year—let Dentrix find, download, and install CDT updates for you.
Updated 12/6/21
Dentistry and the services that dentists provide are continually evolving. According to the ADA, “annual updates enable the CDT Code to effectively accommodate that evolution.” As you provide care for your patients, it’s important to make sure you have the updated codes in Dentrix so that you can use the most up-to-date codes to bill for procedures.
That’s why it’s important to install the yearly CDT Update. That’s also why Henry Schein One created the automatic CDT updater (available in Dentrix version G7.3 update 1 and higher).
In the past, you had to install the CDT Update manually. But now the automatic CDT update feature does that for you. You don’t have to run a separate install or even initiate the process.
The automatic CDT update feature runs through the Dentrix Update Manager, which periodically checks for CDT Code updates. When it finds an update, it will download and install those changes automatically. Don’t worry—you’ll get a notification that these codes have been installed, and you’ll have the chance to review them and decide how you want to handle replacement codes or code description changes.
Pre-requisites
The automatic CDT update is a feature of Dentrix version G7.3 update 1, which was released in March of 2020. You must have G7.3 update 1 or newer installed in order to receive the automatic CDT updates.
To determine which version of Dentrix you have installed, in the Office Manager click Help > About Dentrix. In the Version field in the top-right corner of the dialog box, look for 17.3.535 or any number higher than that. If you are running version 17.3.535 or higher, it means you have the auto CDT update feature and will get the automatic code updates.
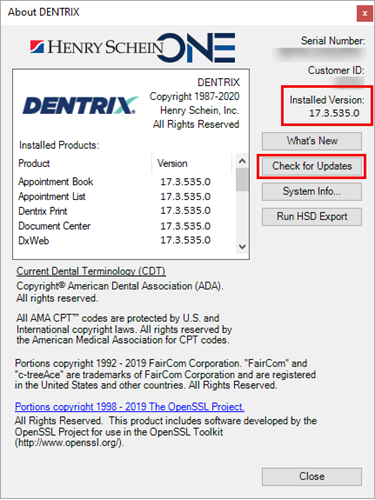
If you are running a version lower than 17.3.535, click the Check for Updates button to find newer versions of Dentrix that are available so that you can upgrade Dentrix and get the automatic CDT update feature.
How Dentrix Notifies You about the CDT Code Update
When Dentrix finds CDT updates, it will automatically download and install the new codes. The next time you open Dentrix, you will see a message that notifies you that Dentrix has installed the CDT update. This message will appear on the first computer to open Dentrix.
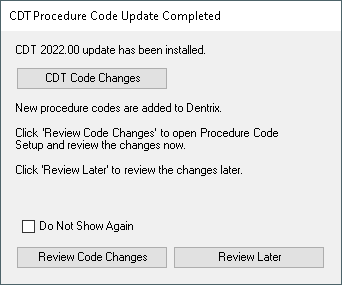
Click CDT Code Changes to review a list of changed codes. Click Review Code Changes to open Procedure Code Setup and review or make changes to your procedure codes based on the new CDT updates, or choose Review Later to close the message and continue working in Dentrix. If you choose to review the codes later, you will continue to see the CDT update message on the first computer to open Dentrix every day until you review the changes. You can also select “Do Not Show Again” to discontinue seeing this message.
If you accidentally close the message or choose not to display it again, it’s okay. You can still review the codes and make changes by opening the Procedure Code Setup dialog box directly (Office Manager > Maintenance > Practice Setup > Procedure Code Setup). If you’re not sure if the new CDT Codes have been installed or not, this is also how you can check.
IMPORANT: When Dentrix installs the CDT Code update, it adds any new codes in the update to your Dentrix software. However, Dentrix will not make changes to existing codes until you specify how you want to handle those changes. You must review the CDT updates and make changes to existing procedure codes in the Procedure Code dialog box before the CDT update is fully integrated into your database.
Reviewing CDT Updates and Making Changes to Existing Procedure Codes
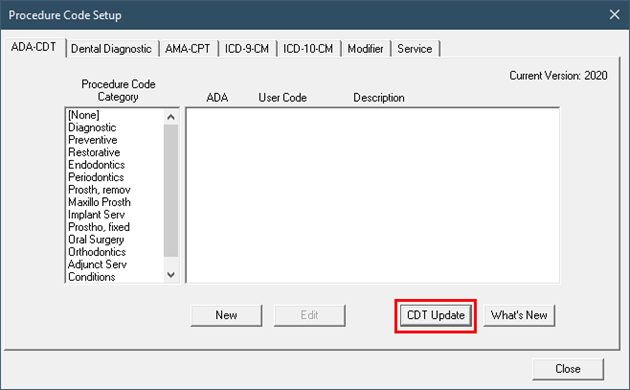
When you click Update Now in the CDT update message, Dentrix will open the Procedure Code Setup dialog box. The first thing you should do is click the What’s New button so you can see the list of what is new and what has changed in the CDT update.
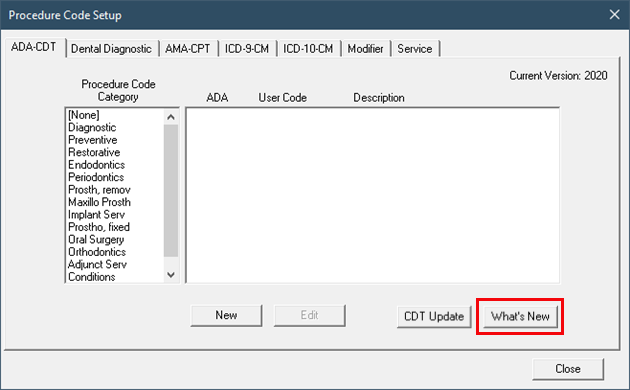
Once you are familiar with the changes in the CDT update, click CDT Update to tell Dentrix how to handle changes to your procedure codes.
You have the option to Reset Procedure Code Descriptions and/or Update Removed CDT Codes. (Note: one of these options may not be available, depending on the kind of changes that are in that year’s CDT Code update.) Select the check boxes to reset procedure code descriptions or update removed CDT codes as needed, and then click OK.
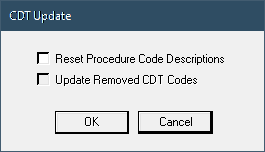
The option to reset procedure code descriptions will reset all of your procedure code descriptions to the default descriptions (based on the CDT update). This will overwrite any procedure code descriptions you may have customized, so consider this option carefully before you click OK. If you choose not to reset procedure code descriptions, Dentrix will still add the descriptions for any new codes in the CDT update. It just won’t overwrite the descriptions for existing codes.
The option to update removed code descriptions is available if any codes have been removed in the CDT update. Dentrix will look for any removed codes that are part of multi-codes you have set up and give you the option to select a replacement code to use instead.
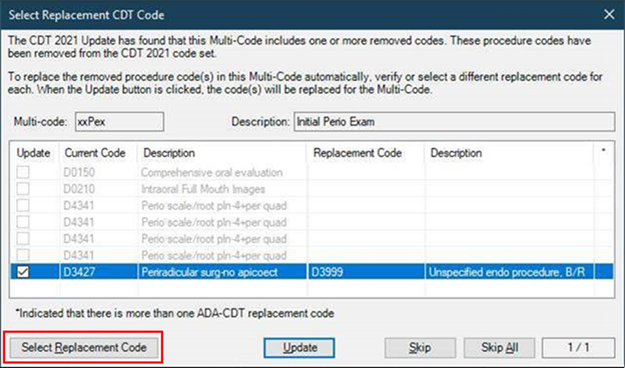
To update removed codes, select the check box next to the code you want to replace, click Select Replacement Code and pick a new procedure code from the list, and then click Update. Once you’re done making changes Dentrix will open the ADA-CDT Log, which shows you which codes were replaced and what they were replaced with.
You have enough to worry about at the end of the year! Take the CDT Code update off of your list and let Dentrix do it for you. Update your version of Dentrix today to make sure you have this important feature.
Learn More
For more information about working with procedure codes in Dentrix, read Procedure Code Setup in Dentrix Help.
To learn more about recent Dentrix releases and watch new feature overview videos, visit the What’s New blog.


