
Verify that your clinical notes have been written and signed each day with the new Dentrix Signature Manager.
Updated 4/10/2023
Each provider faces challenges in their clinical note creation. Some forget to sign them, while others forget to write them. For many offices, at the end of each day, an administrator on your team probably has the time-consuming chore of opening each patient’s chart to verify that clinical notes were properly documented.
Carefully documented and well-written notes provide important evidence of the treatment you provided to your patients. Your state board may even require the notes to be digitally signed, which locks them from further editing. The latest release of Dentrix introduces the Signature Manager, a tool that helps streamline the task of creating and confirming your clinical notes!
Watch the overview video of the Signature Manager.
Opening the Signature Manager
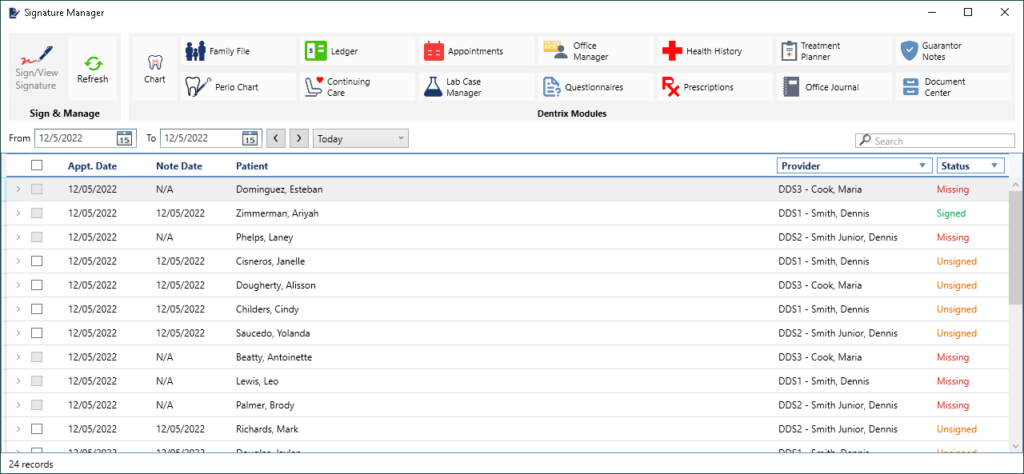
Open the Signature Manager using the toolbar icon in the Patient Chart or the Appointment Book.
You can also click File, point to Switch To, and then click Signature Manager.
Signature Manager will load the information for patients scheduled today. You’ll see three different statuses next to each patient entry: Missing, Unsigned, and Signed.
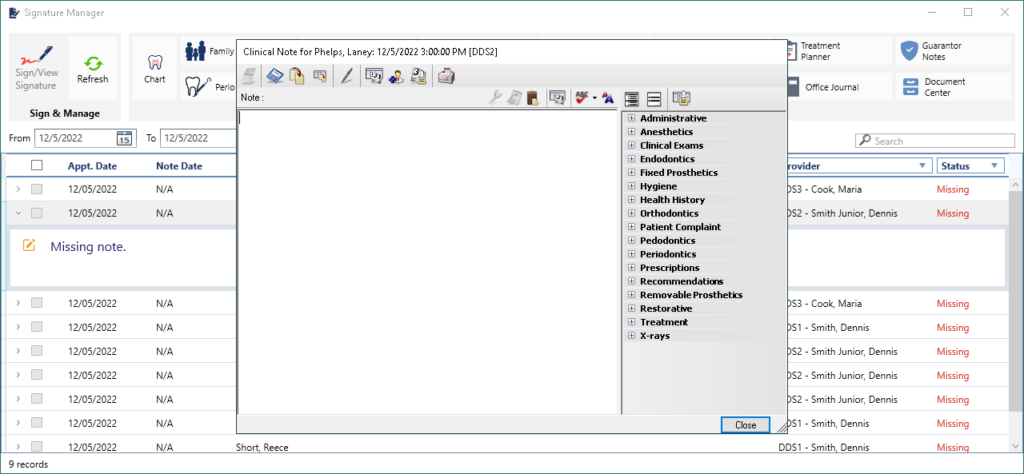
Missing Notes
A Missing status means that no patient note was created on the appointment date. Click on a patient’s row to expand it and reveal the options. Click the Edit icon, and a new window opens allowing you to create the missing note. You’ll have access to the same tools that are in the Patient Chart, including Clinical Note Templates.
Unsigned Notes
The Unsigned status indicates that a note was created for the patient, but a signature was not added to the note. Click on a patient’s row to expand it and reveal the options. You can scroll through and read the text of the note. If you need to make changes, click the Edit button. If the note is ready to sign, click the Sign Note button and add a signature to this individual note.
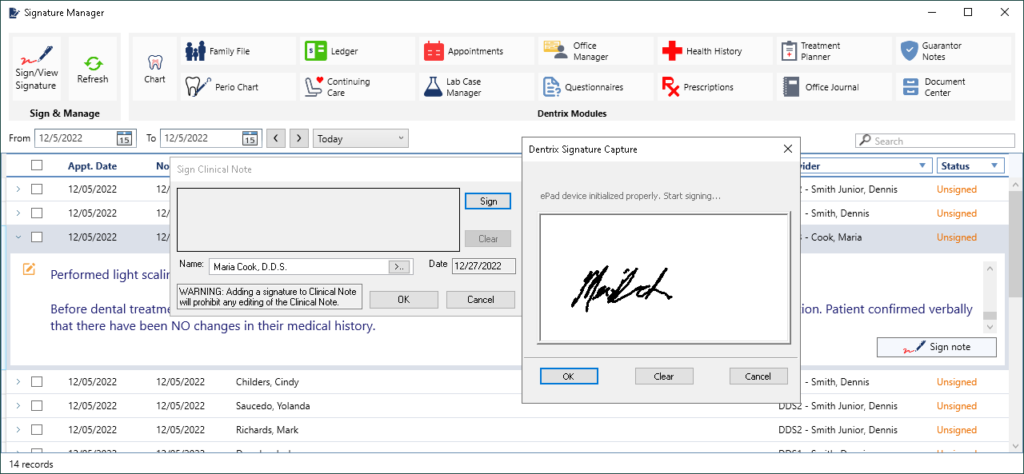
You can also choose to sign all of the unsigned notes at the same time. Use the selection checkboxes at the left of each note and select multiple unsigned notes for the same provider. Then click the Sign/View Signature button on the toolbar. You will be prompted for a signature, and that signature will be applied to all of the selected notes.
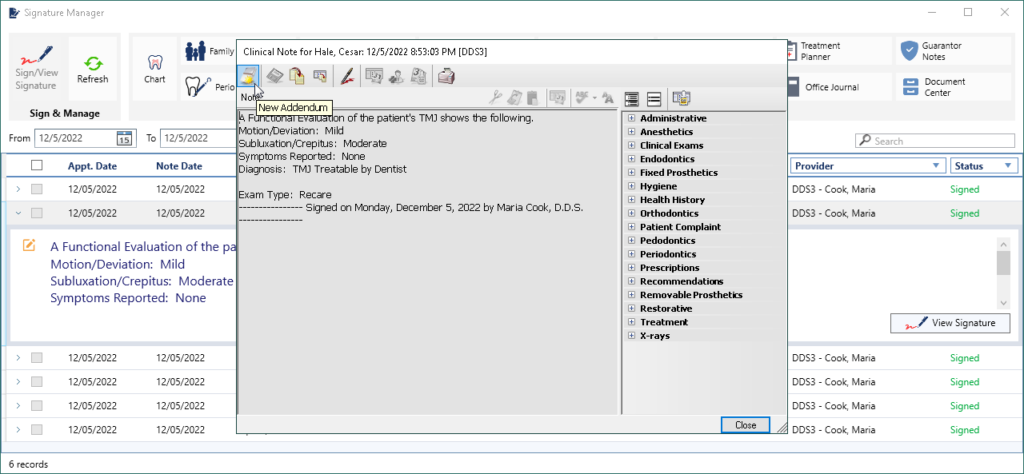
Signed Notes
The Signed status indicates notes that have been created and signed. After expanding the row, view the note and the signature. If you see a problem with the note, click the Edit button to open the note editor. Because it is signed, the note text will be locked. But you can still click the New Addendum button within the editor to enter additional information onto this note.
Sorting Options
Date Picker
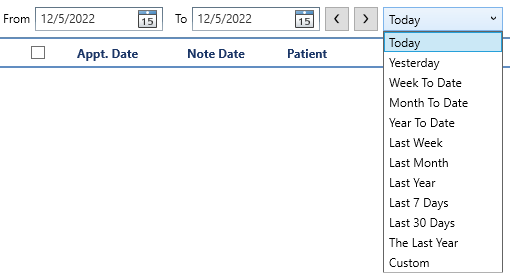
The date picker features a From and To box where you can select exact dates to create a range.
Next to that are backward and forward buttons, where you can navigate a time frame by advancing the selected range.
To the right of these is a menu of preset ranges, such as Today, Yesterday, Month To Date, Last Week, etc. Use this menu to quickly select a specific, custom date range.
Search
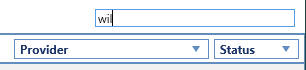
In the search box, type part of a name, date, or other information that could be found within the notes you are interested in looking at. For example, type “Will” to find all notes pertaining to patients or providers named “William.”
Column Headers
By default, the Signature Manager sorts the list by the appointment date. Click the Appt Date, Note Date, or Patient column headers to rearrange the list by alphabetical or chronological order according to the selected header. Click the header a second time to reverse the search (for example, the first click of the word Patient in the column header sorts the list alphabetically from A to Z. A second click reverses the order from Z to A).
Provider and Status Filters
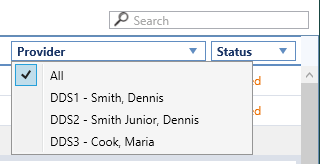
Clicking the Provider or Status column headers will allow you to narrow down the resulting list to a single provider and/or status. For example, if a provider wants to review her own notes and not see notes from other providers, she could click Provider and select her name from the menu to hide the other provider’s patients. She could then select Status and choose Unsigned to narrow the list further. With unsigned notes displayed, she could click the Select All checkbox and then the Sign/View Signature button to sign and close all of her notes in one step.
Conclusion
Of all the documents that your office maintains, your patients’ clinical notes are among the most valuable—and in some cases, legally required. Signature Manager will make it easier to verify that your clinical notes have been written and signed each day.
Learn More
- To see the latest Signature Manager improvements, visit What’s New in Dentrix.
- See these additional tips for creating clinical notes in the article titled, Clinical Notes Made Easier.
- Learn more about the Signature Manager in Dentrix Help.
By Ryan Beardall, Contributing Editor


