
Learn how to set up Dentrix Online Booking options and specify which appointment times and types of appointments patients can book online.
Updated 7/30/20
Do you wish your patients could simply click a button and book their own appointments online? And wouldn’t it be great if those appointments automatically filled open time slots in the Appointment Book? With online booking in Dentrix, you can provide busy patients the option to book appointments 24/7, and those appointments are automatically added to your schedule.
And, best of all, you can control the blocks of time, types of appointments, and providers available for booking. But as you might imagine, there are set up options that you’ll need to adjust to make Online Booking work for your office and your patients — all of which can be accomplished in Dentrix eCentral.
Watch the Online Booking feature overview video to see how the process works, then continue reading for the details about setting up Online Booking. See a demonstration of the online booking setup by watching the Online Booking Setup tutorial video. Once you’re ready for the next step, watch the Finalizing Online Booking tutorial video.
Online Booking Settings
If you want to see a demonstration of the setup, watch the Online Booking Setup tutorial video.
To get started, log in to eCentral and select Appointments > Online Booking > Settings.
Important: Online Booking setup has three pages of setup options. You must click Continue to advance to each page, and then click Save on the final page. If you cancel or leave the setup pages without clicking Save on the final page, all of your changes will be lost, and you’ll have to start over.
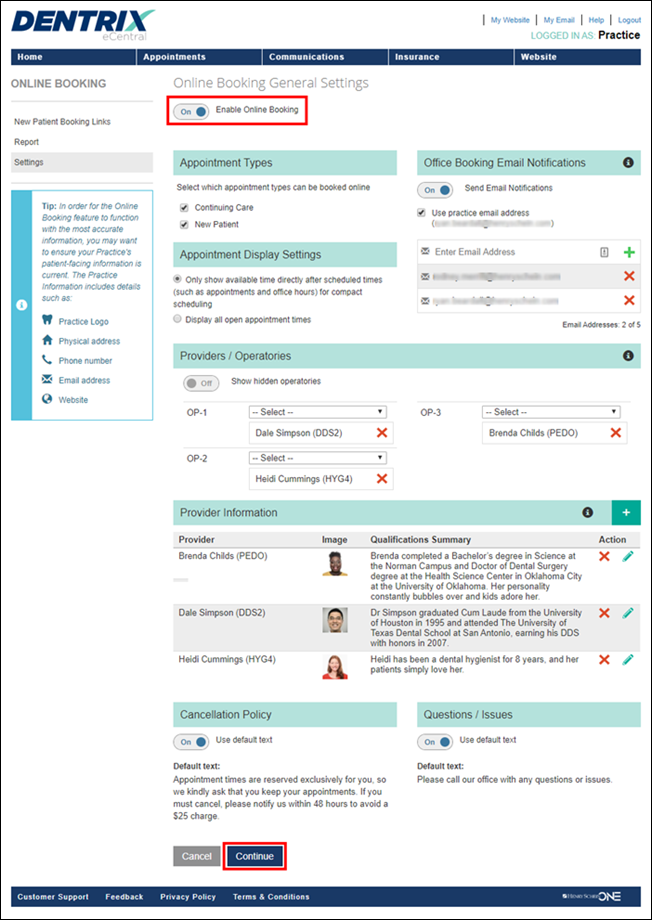
First, move the Enable Online Booking slider to the On position. Work your way down the first page of setup options to select how you want the feature to work. For example, you can select if you want online booking to be available for continuing care appointments, new patient appointments, or both. Decide if you want email notifications sent to patients who book appointments, and which email address those will be sent from.
Under Appointment Display Settings, decide whether you want to show only appointment times that directly follow already scheduled appointments for a more compact back-to-back appointment schedule, or to display all of your open appointment times. You can select the individual operatories you have available for scheduling, and which provider(s) are available within those operatories. You can even add provider information, including a photo and short bio as needed.
Enter customized text for your practice cancellation policy and if patients have questions or issues, or opt to use default text. Then continue on to the second page of setup.
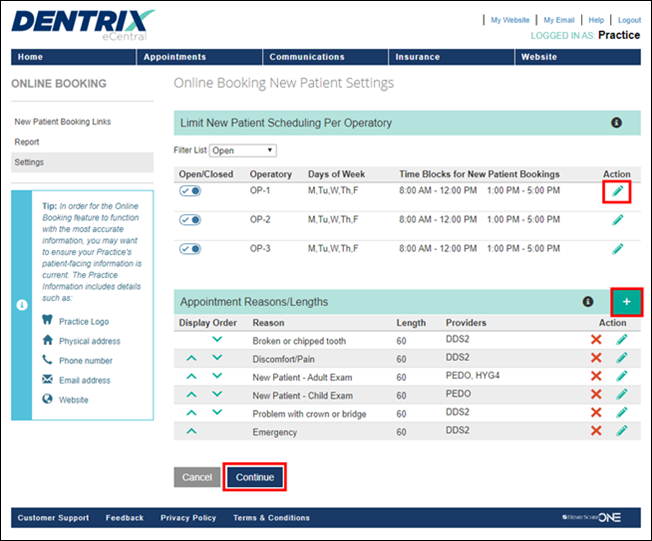
The second page of setup deals with new patient appointments. By default, each operatory’s availability is shown based on the practice hours and operatory hours you set up in Dentrix. You can modify the hours within each operatory you want you want available for new patient appointments by clicking the Action pencil icon and customizing the time block.
When a patient books an online appointment, you can customize the appointment reason, length of the appointment, and provider they can choose from. Add new reasons by clicking the + sign, and customize the options as needed. Then continue to the final page of setup.
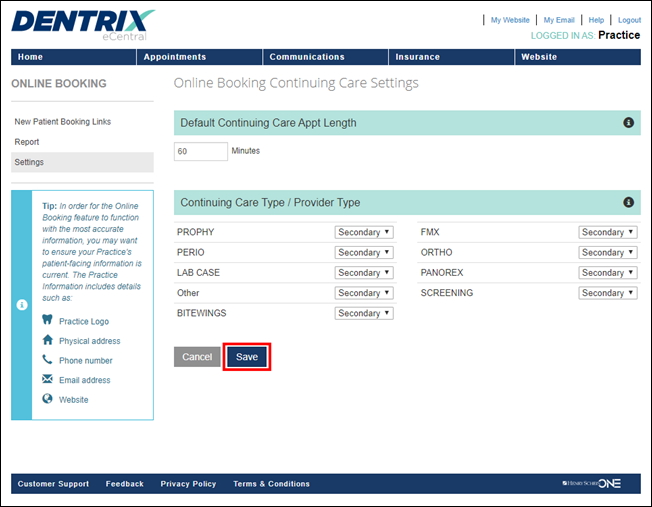
The final page of setup deals with continuing care appointments. Set an average length of time to schedule for continuing care appointments, and then for each continuing care type, select whether the patient’s primary or secondary provider should be assigned to the appointment. Click Save on this final page to save all the settings, including those from previous pages.
New Patient Booking Links
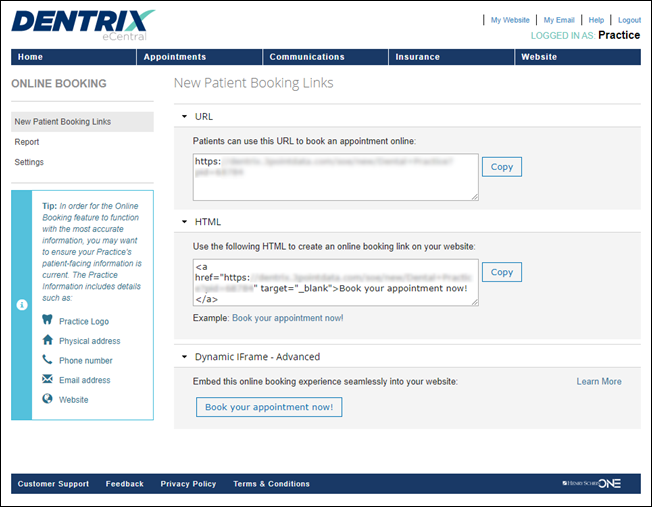
In order for patients to book appointments online, you need to provide them with a link. Online Booking provides three types of links that you can use on your practice website, providers’ webpages, or social media sites for patients to click and begin the online booking process.
To access these links, log in to eCentral and select Appointments > Online Booking > New Patient Booking Links.
There are three types of links you can use:
- URL – This is the website address patients will use to begin the online booking process
- HTML – The code needed to create online booking links on your website or social media site.
- Dynamic iFrame – Your website administrator can click Learn More and use custom coding to add buttons on your website that patients can use to access online booking.
With Online Booking, new patients and continuing care patients will be able to book their appointments at their convenience. Your staff will appreciate making fewer phone calls and the reduced manual work of contacting patients and scheduling their appointments.
Learn More
To see an overview of how Online Booking works, watch the video. For a deeper dive, watch the recorded webinar.
See a demonstration of the online booking setup by watching the Online Booking Setup tutorial video. When you’re ready for the next steps, watch the Finalizing Online Bookings tutorial video.
To learn how to work with appointments that have been booked online, read Online Booking from the Patient’s Perspective and Working with Online Bookings in the Appointment Book.
By Rodney Merrill, Contributing Editor
Certain components of the products or services described above are provided by third parties. Henry Schein One, LLC and its affiliates are not responsible for, and expressly disclaim, all liability for damages of any kind arising out of the use of those third-party products or services.


