
Learn how to manage the appointments that your patients book online.
Updated 7/30/20
When you re-open your practice, you’ll want to make it easy for patients to schedule. They’ve already been waiting for months. Once you re-open, why make them wait a minute longer than necessary to book an appointment?
Dentrix Online Booking is an efficient and simple way to fill open time slots automatically. With online booking in Dentrix, you can provide busy patients the option to book appointments 24/7, and those appointments are automatically added to your schedule.
And, best of all, you can control the blocks of time, types of appointments, and providers available for booking. Free up your front desk team members’ time for contactless check-in and check out and for finding and following up with patients who have urgent treatment needs.
Before You Get Started
Watch the Online Booking feature overview video to see how the process works, then learn about setting up Online Booking by reading the article or watching the video. You need to make sure it is set up before you can work with booking in the Appointment Book.
To see the steps in this article in action, watch the Finalizing Online Bookings tutorial video.
Finalizing the Appointment in the Dentrix
After a patient uses Dentrix Online Booking to schedule their appointment, there are a couple of things you still need to do on the backend to complete the booking. You need to finalize the appointment in the Dentrix Appointment Book and review the appointment in the Online Booking Report.
Let’s say that a patient booked an appointment using Online Booking. Their appointment appears on the schedule in the Appointment Book. There is a blue cloud icon in the top right corner of the appointment, and the Appointment Description shows the option the patient selected from a drop-down list when they booked online.
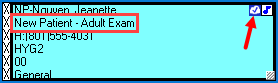
However, at this stage, there are no procedures attached to the appointment. The provider, date and time, operatory, appointment length, and appointment description are all pre-loaded based on the Online Booking settings you set up previously.
You will finalize the appointment by attaching procedures. Double-click the appointment in the Appointment Book to open the Appointment Information window. Add procedures to the appointment using the Initial button in the Reason group box.
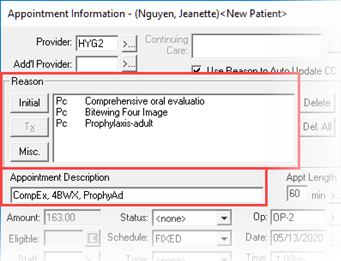
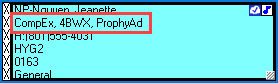
Once you have attached the appropriate procedures, click OK to finalize the appointment. The assigned procedures now appear in the Appointment Description field in the Appointment Information window as well as the Description line on the actual appointment.
Keep in mind that when you finalize a patient’s appointment, the length of the appointment may change based on the procedures you select. If so, you may need to adjust the appointment length as necessary or move the appointment to another day and/or time. If you need to extend the appointment time, it’s good practice to inform the patient of any changes made to an appointment’s length so they are aware and can rearrange their schedule accordingly.
Reviewing the Online Booking Report
In Patient Engage you can get a report of the patients who have booked appointments online. This report will include online bookings that were successful and bookings that did not go through. Use this report to ensure that you have followed on all of the appointments that patients attempted to book online.
To review the report, open eCentral and click Appointments > Online Booking > Report. To find a specific appointment, use the search filters to find the patients by appointment date range or patient name.
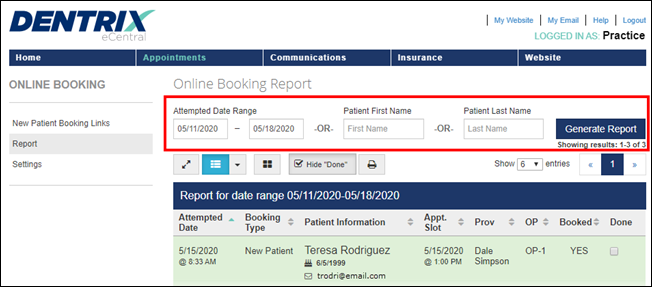
Once you have located the appointment, review it for accuracy. The patient’s email address and phone number is included on the report should you need it to contact them if you have questions about the appointment. Once your review is complete, check the Done box to remove the appointment from the report.
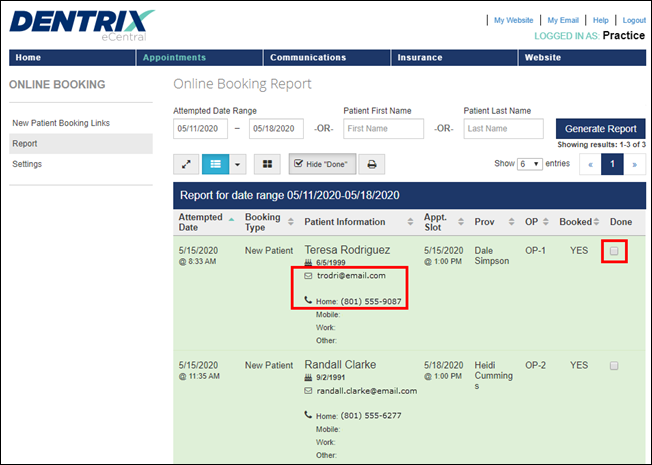
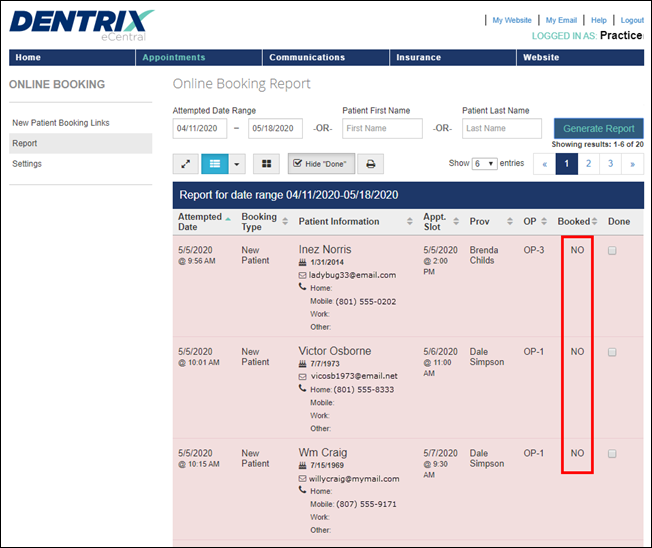
Appointments on the report are shown in either red or green. Green appointments were successfully booked and need to be reviewed. Red appointments were not successfully booked. This can be for a number of reasons, such as when two patients tried to schedule the same appointment time and one was successful and the other was not. You can use the phone number or email information to contact the patients with red appointments and help them book their appointment at a different time.
Once you have finalized patient appointments and reviewed and cleared them from the Online Booking Report, that’s it! You’re ready to greet the patients when they arrive for their appointment.
Learn More
To see an overview of how Online Booking works, watch the video. For a deeper dive, watch the recorded webinar.
Watch the videos to see a demonstration of Online Booking Setup and Finalizing Online Bookings.
To learn how to work with appointments that have been booked online, read Online Booking from the Patient’s Perspective and Setting Up Online Booking Options.
By Rodney Merrill, Contributing Editor
Certain components of the products or services described above are provided by third parties. Henry Schein One, LLC and its affiliates are not responsible for, and expressly disclaim, all liability for damages of any kind arising out of the use of those third-party products or services.


