
Ideas to better organize cases and treatment plan information in Dentrix to make it easier for you to present and for patients to understand.
How do you present treatment plans to patients in your office? Do you present them by displaying the Dentrix Treatment Planner on your computer monitor for the patient? Do you print the treatment case and present it to the patient on paper? Or do you use a combination of on-screen and printed presentations based on the situation?
No matter which method you use, here are some tips that you can use when presenting treatment plans to patients.
Watch our on-demand webinar titled, 10 Time-Saving Treatment Planning Tips
for additional treatment planning information.

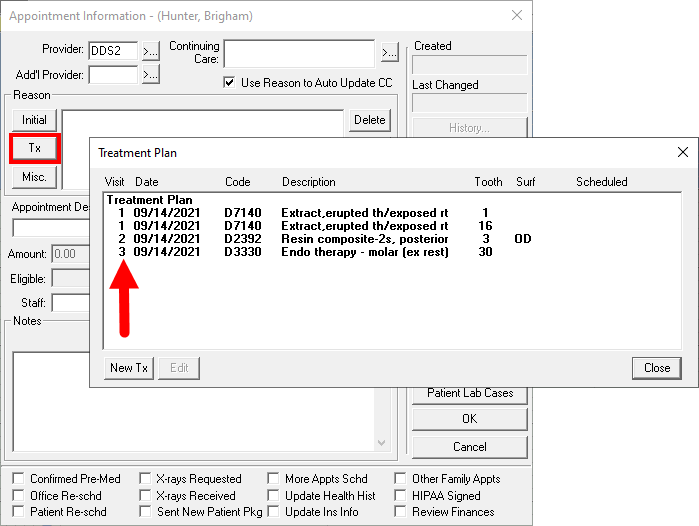
Ordering Procedures by Visit
Whether you are printing the treatment case or presenting it on-screen, it’s always a good idea to arrange the treatment plan based on priority and ordering visits for procedures. It can help your treatment coordinator to have a conversation with the patient about which procedures are the priority, and the patient will be able to see their portion of each visit either on screen or on the printed treatment case so that they can be financially prepared for each visit.
Another benefit of ordering procedures by visit is that the administrative team will be able to see which visit should be scheduled next within the Appointment Information window.
Setting Case Severity
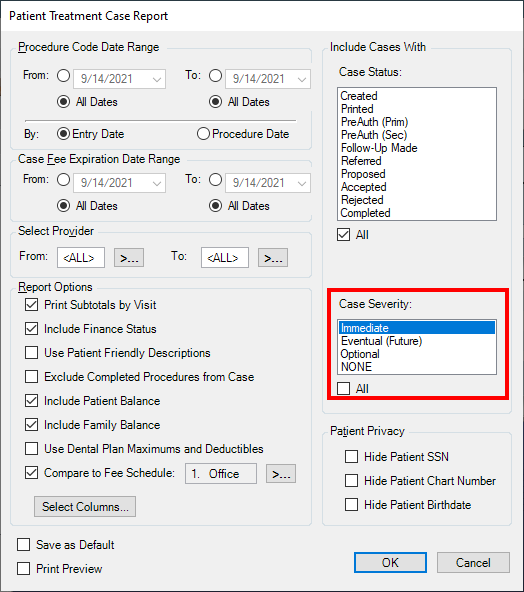
Another good tip when creating treatment plans is to set the case severity. The case severity is indicated by a red, yellow, or green light icon on the treatment case in the Treatment Planner to specify whether the treatment case severity is immediate, eventual, or optional. A patient may have a treatment case for veneers, which is optional, while they have another treatment case for a root canal and crown that needs to be scheduled immediately. By setting case severity for the treatment case, your administrative team will know how urgently they need to schedule a procedure, and the patient will also see the colored light icon next to the case in the Treatment Planner as a visual reminder.
You can also choose to include the case severity as an option when printing treatment cases, which will communicate the urgency to the patient.
Selecting Information in Treatment Planner View
You can select what type of procedure information is displayed when viewing the Treatment Planner: information such as entry date, procedure code, tooth number, and description. These options are found in the Treatment Planner’s View menu, under the Procedure Information option.
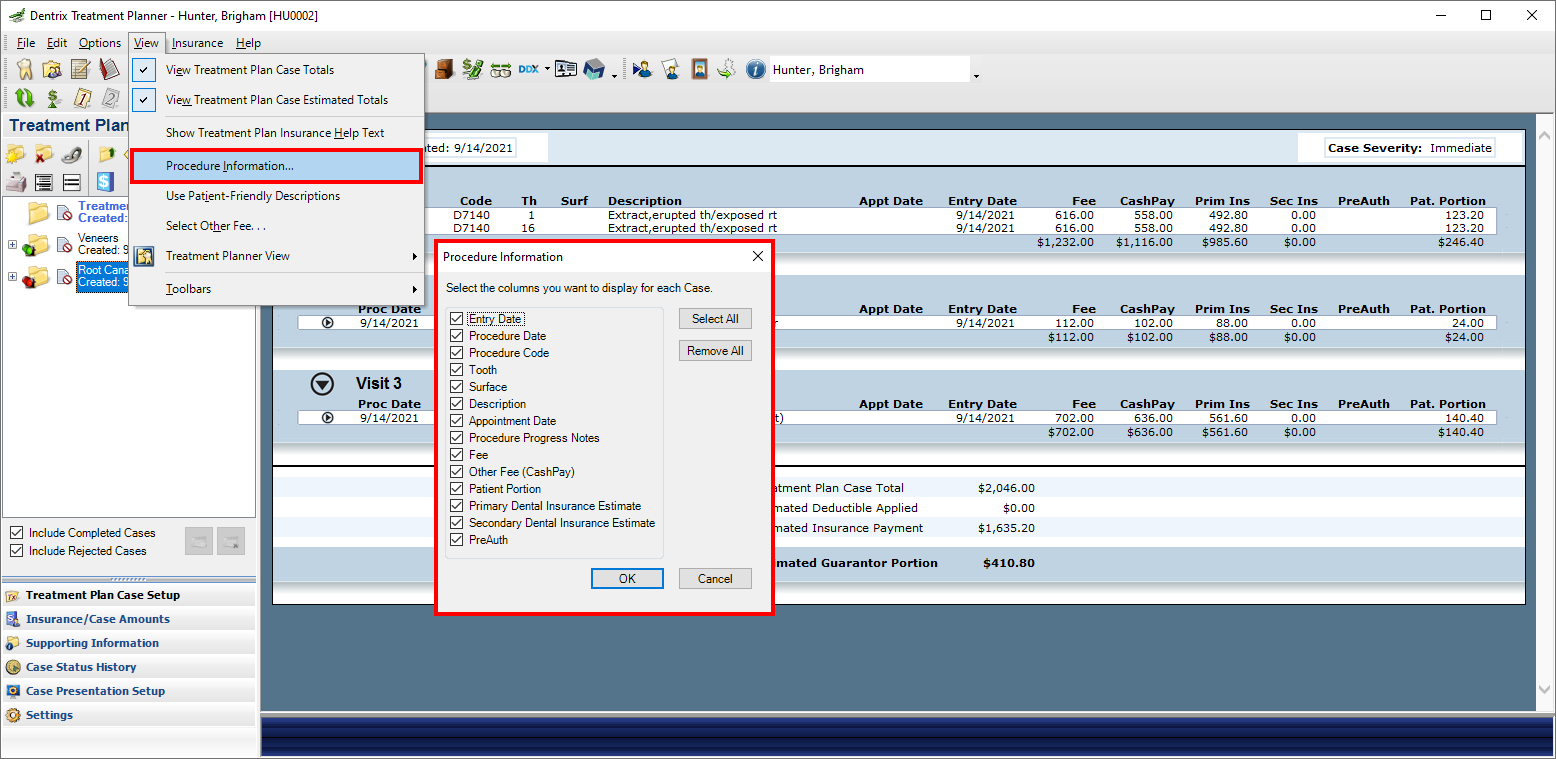
How much (or how little) information you want to display depends on your office. Some offices like to have very minimal information, while others like more.
Two of my favorite options to display are the Procedure Progress Notes and the Other Fee. For example, if a patient needs a replacement crown, and the insurance won’t consider any benefits due to a ten-year replacement period for crowns, I like to notate that information in the Procedure Progress Notes and then select the option to display those in the Treatment Planner. This makes it very clear to the patient exactly why they will be responsible for payment for the procedure in full.
For treatment plans for patients who are being charged a fee schedule amount based on your office being in-network with their insurance plan, I like to display the Other Fee as the office fee along with the fee schedule procedure amount. This allows patients to see how much of a discount they are receiving by choosing your office, since you are in-network with their insurance. It can help to create value and can increase case acceptance. You can set the Other Fee to be your office fee. To do this, from the View menu, click Select Other Fee and select your office fee schedule.
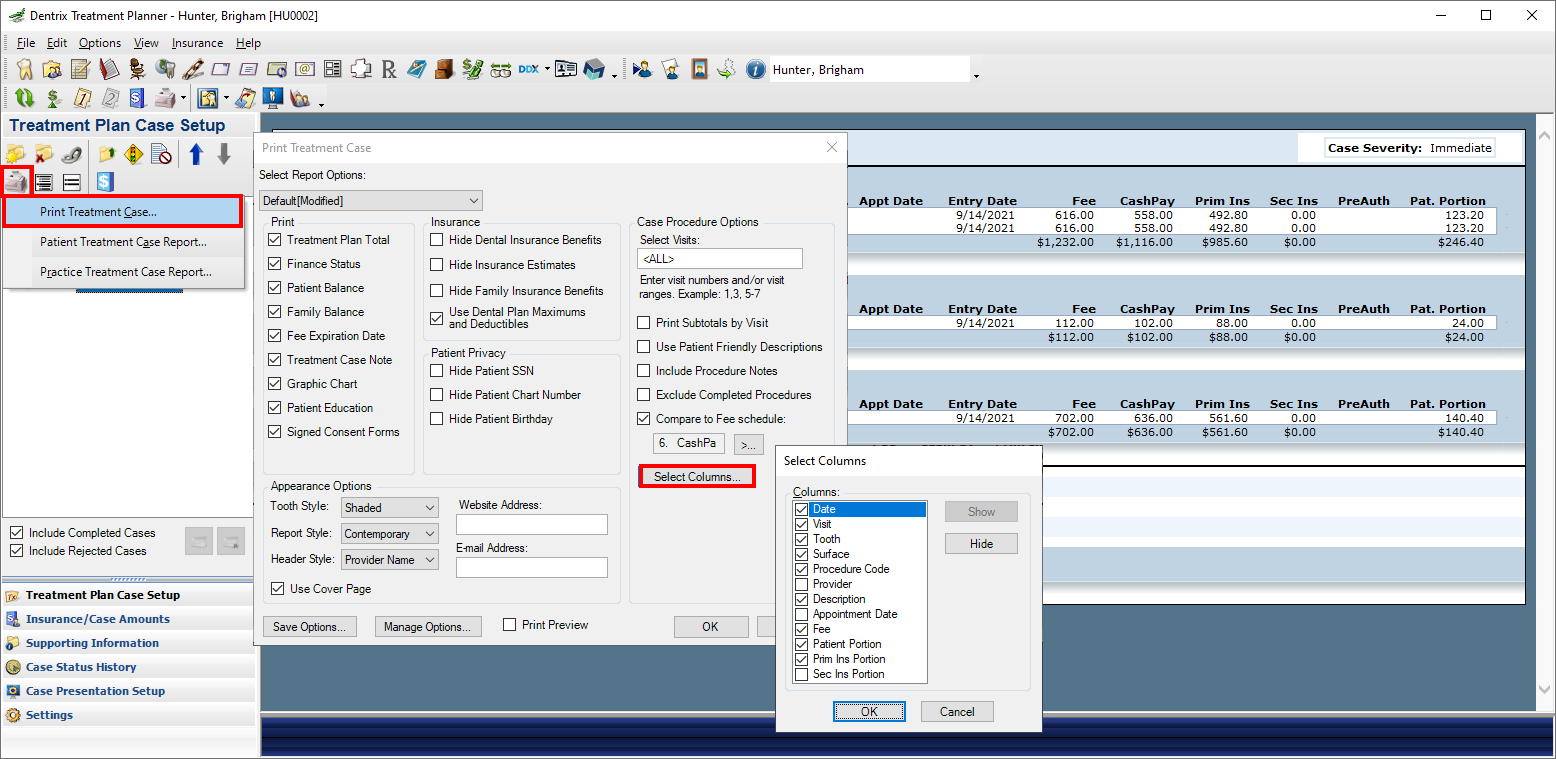
Customizing Info on Case Printouts
You can also select what procedure information is displayed on printed treatment cases. When you select Print Treatment Case, select the options you want to include, and then click Select Columns for additional information to print.
Understanding Treatment Plan Estimates
An exciting new feature in Dentrix G7.5 Update 2 provides detailed information about how Dentrix is calculating insurance estimates. You’ll be able to see if the estimate involves a deductible, if the patient is reaching their insurance maximum, if the insurance payment is being calculated based on information in the payment table, and other explanations. This is an easy-to-use feature, and you can view or hide the explanations by individual procedure or for an entire treatment case. This feature will save offices lots of time by not having to research this information themselves. It is also a great tool to use when presenting treatment plans, so patients better understand why their insurance is estimated to pay a particular amount. This new information, however, will only be displayed onscreen in the Treatment Planner.
Whether you present treatment plans to patients onscreen or printed on paper, you can use these Treatment Planner features to customize and create treatment cases that are clear and easy to understand for your patients.

Learn More
Watch the on-demand webinar titled, 10 Time-Saving Treatment Planning Tips for additional information.
For additional information, read Tips for Setting Up Treatment Plans.
To learn more about the new features in Dentrix G7.5, and prepare your team for the upgrade, watch this on-demand webinar recording.
By Charlotte Skaggs
Certified Dentrix Trainer and The Dentrix Office Manager columnist
Charlotte Skaggs is the founder of Vector Dental Consulting LLC, a practice management firm focused on taking offices to the next level. Charlotte co-owned and managed a successful dental practice with her husband for 17 years. She has a unique approach to consulting based on the perspective of a practice owner. Charlotte has been using Dentrix for over 20 years and is a certified Dentrix trainer. Contact Charlotte at [email protected].


